High-power LED grow light – a build log
To make my growing season preparations more high-tech, I built a grow light with more than 25,000 lumens of light output, spending less than US$300. Note: this article was written in 2013, and prices have risen since then.
During the build, I posted pictures and short notes on the Makers, Hackers, Artists, and Engineers Google+ community (now defunct) and received a lot of questions about LED choice, drivers, the bill of materials, and construction details. This article is intended to answer these questions—and hopefully generate new ones. Please don’t hesitate to ask!
Goal of the Project
Plants perform photosynthesis differently under different wavelengths of light. The "good" light is known as Photosynthetically Active Radiation (PAR). Not all light sources emit much PAR, even if they look bright to the human eye. This means that simply using any bright light isn't enough for good plant growth.
I wanted to create a high-intensity light source that produces a lot of PAR, runs cool enough to avoid heat-stressing plants, lasts for many seasons, and remains affordable.
Power Supply
A lot of cheap power supplies exist on the market, especially in the world of LED lighting. However, many low-cost options are poorly made or outright dangerous. Dealing with clones involves some effort—you’ll need to:
- a) Inspect the inside of the power supply
- b) Test basic functionality
- c) Measure parameters like ripple and efficiency
- d) Return the item if you're unhappy with any of the previous steps
This can take time, but it’s worth it for safety and reliability.
I ended up selecting a Meanwell SP-320-48 power supply. It's slightly more expensive than a no-name supply, but it's rock solid. Also, some clones of this particular model I've seen actually have a Meanwell power supply inside.
LEDs
Choosing the right LEDs was a crucial part of this project. I considered several options:
- COB (Chip-on-Board) LEDs: These have many emitters packed into a single module. They are efficient, affordable, and easy to mount.
- High-Power Single-Emitter LEDs: These are powerful but more expensive per watt, harder to cool, and require more complicated assembly.
- LED Strips: Convenient for low-power builds, but usually too weak for high-intensity growing without massive numbers.
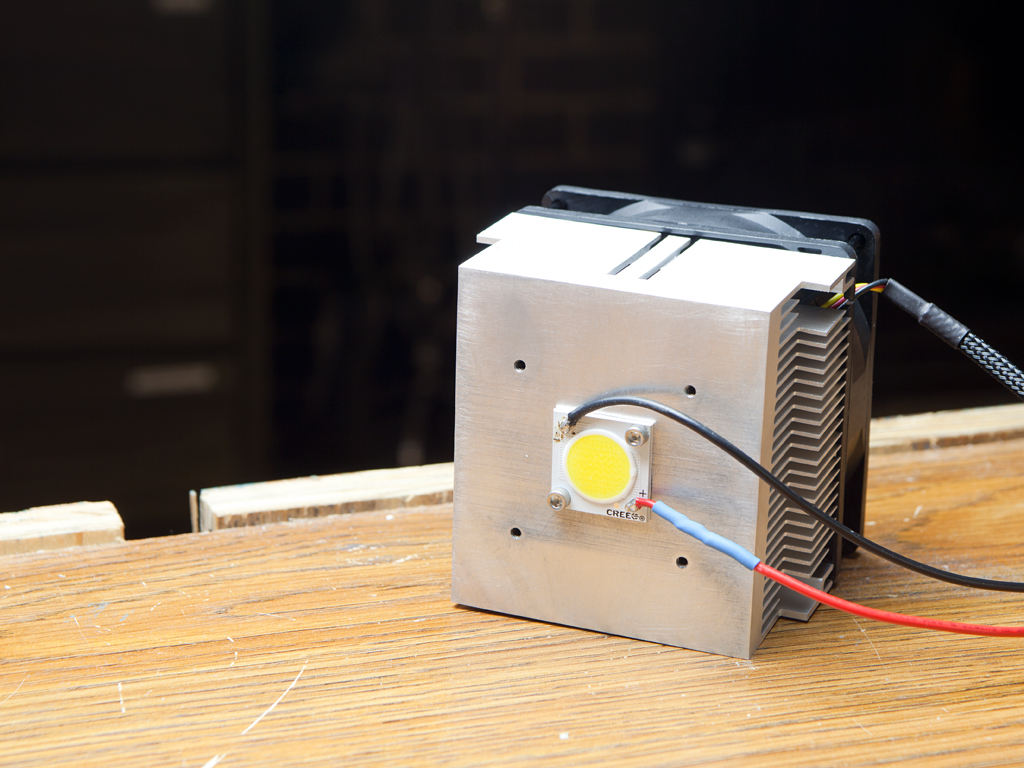
COBs were the best choice for me. Specifically, I used Cree CXA2011 LEDs (datasheet). They have a high luminous efficacy, good spectral output, and are reasonably priced. They come in several different color temperatures, the full part number of ones that I use is CXA2011-0000-000P00J050F.
LED Driver
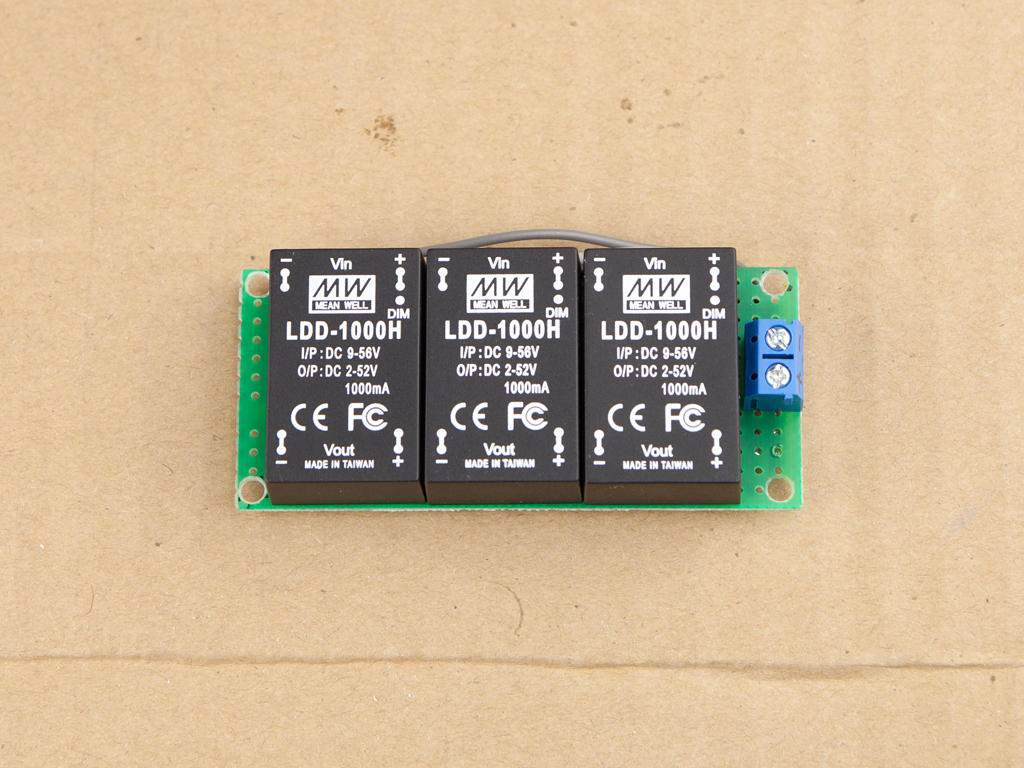 Another important part of the build is the LED driver. I used a Meanwell LDD-1000H driver. It's a constant current driver, which means that it will maintain a constant current through the LEDs, regardless of the voltage drop across the LEDs. This is important because the LEDs are very sensitive to voltage changes.
Construction
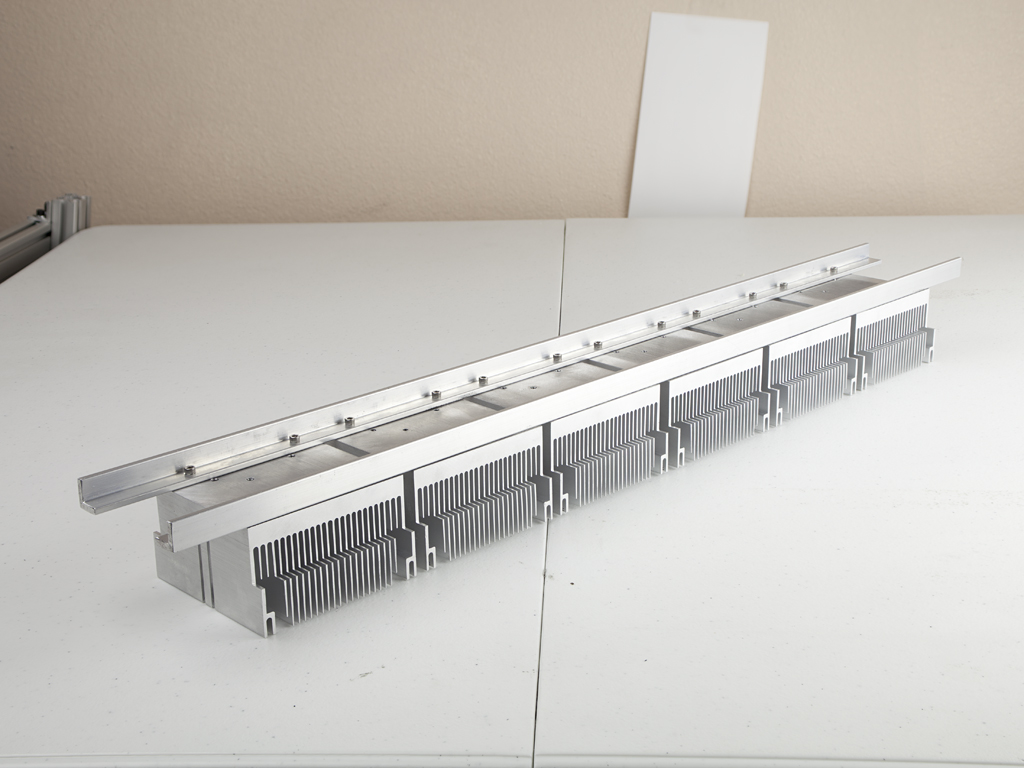
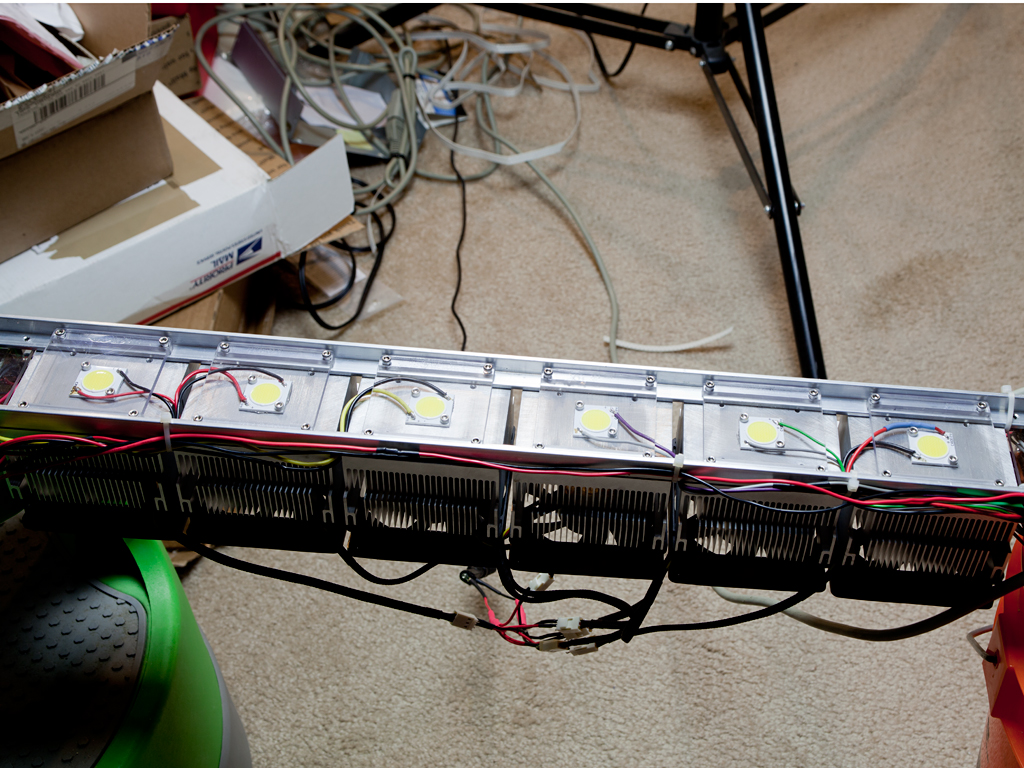
I mounted the LEDs onto large aluminum heatsinks. Originally, I considered placing two LEDs per heatsink, but in the end, I decided to use just one per sink for better thermal performance and simplicity. I used Rosewill-RCX-Z80-AL, originally designed for an AMD CPU and capable of dissipating about 100W when the fan is working.
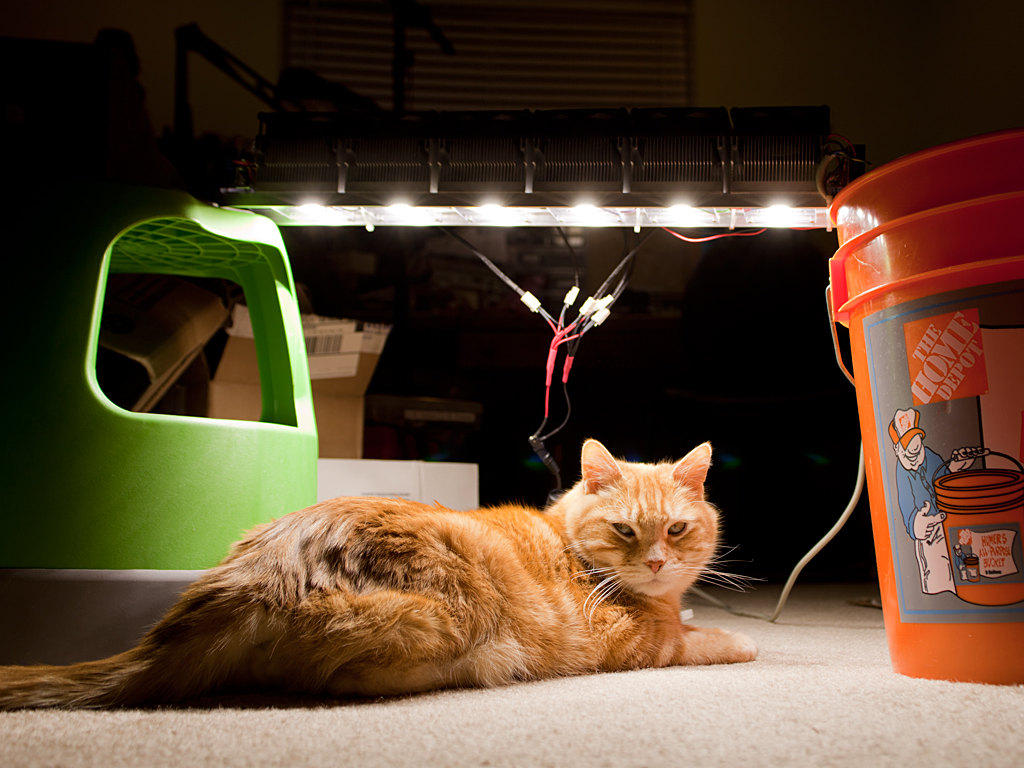
Fans were added to actively cool the heatsinks. An advantage of having fans is that they add air movement in a grow room which is beneficial for plants, reducing the risk of mold and strengthening stems. Six fans produce a nice breeze—not too strong, but enough to create a healthy environment.
The disadvantages of having fans are:
- More points of failure - fans can die and when they do the heatsink will overheat and the LED will burn out rather quickly
- Slight noise
- Slightly higher power consumption
Still, in my opinion, the benefits outweigh the downsides.
Thermal Management
 LEDs are very sensitive to heat. Higher temperatures shorten their lifespan and reduce their efficiency. Good cooling is non-negotiable. I already mentioned fans; another important part of the cooling system is the thermal interface. I used Arctic-Silver-AS5-3 thermal paste. It's a high-quality paste that is easy to apply and provides excellent thermal performance.
At full power, my heatsinks remain below 55 °C even after hours of operation. Ambient room temperature was about 23 °C during testing. This is a great result and should ensure long LED life.
It was probably possible to mount two LEDs per heatsink and still achieve acceptable temperatures, but I preferred to be conservative.
If you want to understand why heat is so critical for LEDs, we could dig through datasheets—or we can shortcut the discussion: every 10 °C rise in junction temperature typically halves the expected lifespan of an LED.
In short: Keep them cool!
Light Output
I don’t own a photometer, so I have to estimate light output using the datasheet. The first step is to determine the operating temperature of the module. According to the datasheet, the effective thermal resistance from junction to case is 0.4 °C/W. This means that at 48 W, the die will be approximately 20 °C warmer than the case.
I’m assuming that all the energy consumed by the LED is converted to heat, which is a very conservative estimate. Early illumination-grade LEDs converted about 10% of energy into light; modern ones are closer to 20%. At 20% efficiency, the temperature rise would be around 15 °C.
The measured temperature difference between the case and the heatsink (as noted earlier) is 1 °C — which we can safely ignore, since it’s negligible. The ambient temperature in my small grow room, where this light has been running for several days, is 30 °C. Adding 20 °C (junction-to-case rise) to 30 °C (ambient) gives a junction temperature of 50 °C — the operating temperature of the LED die.
We could continue analyzing the datasheet, or take a shortcut by referring to following presentation (local copy), which states that each module outputs 3480 lumens at 45 W and 85 °C (see page 7). This means my setup, using six modules, produces 23,040 lumens.
Since my emitters run cooler, they produce more light. How much more? Referring again to the datasheet (page 5), we can see that at 50 °C, light output increases by roughly 10%. That brings my total output to over 25,000 lumens — specifically, 25,344 lumens. The increase corresponds to the output of 0.6 LED modules. In other words, the heatsink fans justify their power draw: they consume 12 W, but effectively add (or save) 27 W of luminous output.
The plants love it. They grow very well, and I’m very happy with the results. I’ve been using this light for several years now. Apart from an occasional fan — and its corresponding emitter — failing, the system still works great. In a grow tent, this setup can easily support 2–3 medium-sized plants or a large tray of seedlings.
Final Thoughts
This project was a lot of fun and very educational. Building your own grow light isn't difficult, but it requires some attention to detail, especially in cooling, wiring, and parts selection.
Compared to buying a commercial grow light of similar power and efficiency, I saved about 50–70%, plus I learned a lot and got a custom solution tailored to my needs.
If you're considering building your own, I highly recommend it!